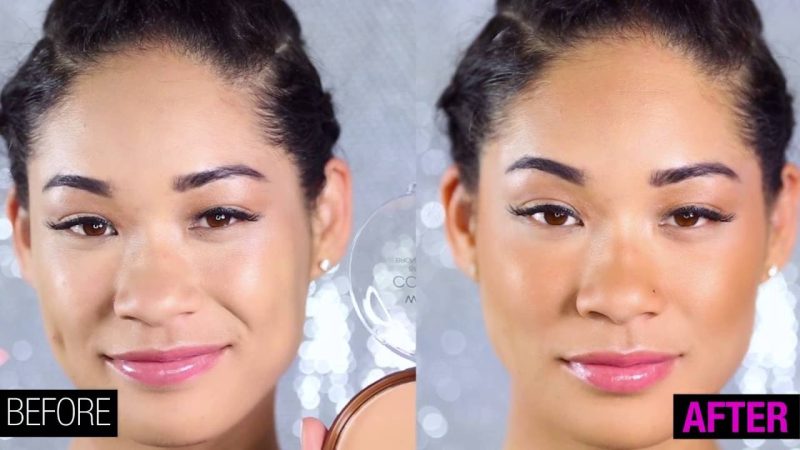
A glowing, sculpted face is one of the most desired looks in makeup — and the secret to achieving it lies in mastering bronzer and highlighter. These two products, when used together correctly, can completely transform your complexion. Bronzer adds warmth and definition, while highlighter enhances your features with light and radiance.
Whether you prefer a subtle, sun-kissed finish or a full-on glam glow, learning how to balance bronzer and highlighter is key. This comprehensive guide will walk you through everything from product selection to placement, helping you achieve that flawless glow every time you apply your makeup.
Understanding the Difference Between Bronzer and Highlighter
Before learning how to use bronzer and highlighter together, it’s essential to understand their purposes.
- Bronzer mimics a natural tan and adds warmth to the face. It’s applied to areas where the sun naturally hits — like your forehead, cheeks, and nose.
- Highlighter, on the other hand, brings light to high points of the face such as the cheekbones, brow bone, and bridge of the nose.
Together, bronzer and highlighter create a balanced look — bronzer adds depth and dimension, while highlighter lifts and brightens.
Choosing the Right Bronzer for Your Skin Tone
The key to natural warmth lies in picking a bronzer shade that complements your skin tone.
- Fair Skin: Opt for soft beige or light honey tones with a hint of warmth.
- Medium Skin: Choose golden or caramel bronzers that enhance your natural undertone.
- Olive Skin: Try warm amber or terracotta shades that add depth.
- Deep Skin: Rich chocolate, copper, or red-based bronzers look stunning.
When choosing bronzer and highlighter, always consider undertones. If your skin has a cool undertone, go for bronzers with neutral or rose hints; for warm undertones, choose golden or peachy hues.
Picking the Perfect Highlighter for Your Glow
Highlighter should enhance your natural radiance, not overpower it.
The right tone makes all the difference:
- Fair Skin: Choose pearly, icy, or champagne highlighters.
- Medium Skin: Opt for golden or peach shades that warm up the complexion.
- Olive Skin: Rose gold or warm honey tones complement beautifully.
- Deep Skin: Bronzey or coppery highlights deliver the perfect glow.
When pairing bronzer and highlighter, ensure they share the same undertone (warm with warm, cool with cool) for a seamless, harmonious finish.
Prepping Your Skin for a Flawless Application
Even the best bronzer and highlighter won’t look great on dry or uneven skin. Proper skin prep ensures your products blend effortlessly and last longer.
- Cleanse and Exfoliate: Start with a smooth base.
- Moisturize: Hydrated skin reflects light better.
- Prime: Apply a primer to even out texture and enhance product grip.
A glowing complexion starts with skincare — not just makeup. Once your base is set, your bronzer and highlighter will glide on smoothly, creating a more natural finish.
Applying Bronzer: The Art of Adding Warmth
Bronzer application is about adding dimension, not changing your skin tone. The goal is to mimic where the sun would naturally hit your face.
Use a fluffy, angled brush to apply bronzer lightly across the:
- Temples and hairline
- Hollows of the cheeks
- Bridge of the nose
- Jawline
Blend in soft, circular motions for a diffused effect. When using bronzer and highlighter, always apply bronzer first — it sets the foundation for warmth before you add brightness with highlight.
Pro Tip: The “3-shape” technique works wonders. Sweep bronzer along your temples, cheeks, and jawline in the shape of the number three on each side of your face.
Applying Highlighter: Bringing Light to Your Features
Now that your bronzer is in place, it’s time to use highlighter strategically. Highlighter catches the light and draws attention to your best features.
Apply it to these areas:
- Tops of the cheekbones
- Bridge (not the tip) of the nose
- Brow bone
- Cupid’s bow
- Inner corners of the eyes
Use a fan brush or your fingertip to gently press the product onto your skin. Avoid overdoing it — the goal is a natural glow, not a glittery stripe. When blending bronzer and highlighter, ensure the transition between warmth and glow looks seamless.
The Right Tools for Perfect Blending
Even high-end bronzer and highlighter can look patchy without proper tools.
Here’s what you need for a flawless finish:
- Bronzer Brush: A large, fluffy, angled brush ensures even blending.
- Highlighter Brush: A small fan or tapered brush gives precise control.
- Beauty Sponge: Perfect for softening edges and merging bronzer and highlighter together.
The secret to a natural glow lies in blending. Buff lightly in circular motions where the bronzer and highlighter meet — around the upper cheek area — to create a smooth, radiant transition.
Cream vs. Powder: Which Bronzer and Highlighter Should You Choose?
The choice between cream and powder depends on your skin type and the look you want to achieve.
- Powder Bronzer and Highlighter: Ideal for oily or combination skin; gives a matte, long-lasting finish.
- Cream or Liquid Formulas: Perfect for dry or mature skin; delivers a dewy, natural glow.
You can also combine the two for a more dimensional look — apply cream products first, set lightly with powder, and finish with a touch of bronzer and highlighter powder for staying power and intensity.
Common Mistakes to Avoid When Using Bronzer and Highlighter
Even experienced makeup lovers make a few missteps when working with bronzer and highlighter.
Here are the most common mistakes and how to fix them:
- Using Too Much Product: Start with a light hand and build gradually.
- Applying Bronzer Too Low: Keep it above the hollows of your cheeks to avoid dragging your face down.
- Wrong Shade Match: Avoid shades that are too orange or too light — they look unnatural.
- Skipping Blending: Harsh lines between bronzer and highlighter ruin the illusion of natural light.
- Applying Highlighter Everywhere: Stick to strategic areas — too much shimmer can accentuate texture.
Small corrections make a big difference when achieving that seamless, glowing finish.
Finishing Touches: Making Your Glow Last All Day
After applying bronzer and highlighter, it’s time to set everything in place for a long-lasting, radiant finish.
- Setting Spray: Locks in your look and adds a natural glow.
- Translucent Powder: Apply lightly to areas prone to shine (not on the highlighter).
- Reapply Strategically: If needed, touch up bronzer mid-day but avoid layering too much highlighter.
To enhance your glow, pair your makeup with soft blush tones and a luminous foundation. The combination of bronzer and highlighter with dewy skin gives you that effortless, healthy-looking radiance.
Conclusion
Mastering bronzer and highlighter is one of the simplest ways to elevate your makeup routine from flat to flawless. Bronzer brings warmth and depth, while highlighter adds that luminous glow that catches the light in all the right places.
The key lies in balance — blending the warmth of bronzer with the brilliance of highlighter to sculpt, define, and brighten your features naturally.
No matter your skin tone or makeup style, the right bronzer and highlighter combo can instantly enhance your complexion and give you that coveted, sun-kissed glow. With practice, the glow you create will look effortless — like it comes from within.
FAQs
1. Can I wear bronzer and highlighter without contour?
Yes! While contour adds sharper definition, bronzer and highlighter together can sculpt and illuminate your face for a softer, natural effect.
2. Should I apply bronzer or highlighter first?
Always apply bronzer first to warm up the face, then follow with highlighter to accentuate the high points.
3. Can I mix cream and powder products?
Yes, but layer correctly. Apply cream bronzer and highlighter before powder to avoid patchiness.
4. What’s the best brush for applying bronzer and highlighter?
Use a fluffy angled brush for bronzer and a small tapered or fan brush for highlighter to ensure precise application and blending.
5. How do I make my bronzer and highlighter last longer?
Use primer before application, set your makeup with setting spray, and choose long-wear or waterproof formulas for all-day glow.
Also read: How Long Does Gel Nail Polish Take to Dry? Complete Guide for Perfect Results