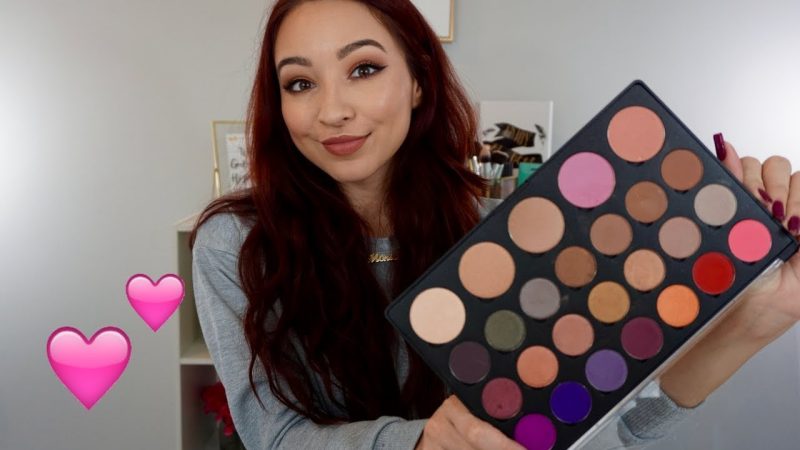
If you’ve ever dreamed of crafting your perfect mix of eyeshadows without buying multiple palettes, it’s time to make your own eyeshadow palette. Whether you’re an aspiring makeup artist or a beauty enthusiast who wants full control over colors and finishes, creating your own palette is both fun and budget-friendly.
In this detailed guide, we’ll show you everything you need to know — from selecting the right pigments and tools to assembling your custom palette that perfectly matches your style and skin tone.
Why Make Your Own Eyeshadow Palette?
There are countless reasons to make your own eyeshadow palette instead of purchasing pre-made ones:
- Customization: Choose the exact shades that match your personality and style.
- Sustainability: Reduce waste by reusing magnetic pans and empty cases.
- Quality Control: Decide what ingredients go into your eyeshadows — perfect for sensitive skin.
- Budget-Friendly: Buying pigments individually is often cheaper than purchasing multiple palettes.
Creating your palette gives you full creative freedom while helping you understand your makeup preferences better.
Tools and Materials You’ll Need
Before starting, gather the following essentials for your DIY project:
Basic Tools
- Small metal pans or magnetic pans
- Empty magnetic palette case
- Mixing bowl and spatula
- Rubbing alcohol (70% or higher)
- Pressing tool or coin wrapped in a clean cloth
- Dropper bottle
- Gloves
Ingredients
- Cosmetic-grade mica pigments
- Binder or mixing medium (e.g., jojoba oil, dimethicone, or glycerin)
- Preservative (optional but recommended)
- Base powder (such as kaolin clay or sericite mica)
Having these ready before you start will make the process smoother and cleaner.
Choosing Your Eyeshadow Colors
When you make your own eyeshadow palette, picking the right colors is where the fun truly begins.
Think about the looks you wear most often — everyday neutrals, bold statement shades, or soft romantic tones.
To create a balanced palette:
- Include light shades for highlighting and blending.
- Add mid-tones for transitions.
- Choose deeper shades for definition and contour.
Pro Tip: If you’re a beginner, start with a 6-pan palette — three mattes and three shimmers. This balance gives you plenty of versatility without being overwhelming.
Understanding Eyeshadow Formulas
Before mixing, decide what type of formula you want to make:
- Matte Eyeshadows: Made mainly from pigments and fillers like talc or kaolin. These require less binder to stay powdery.
- Shimmer or Metallic Eyeshadows: Contain mica for a shiny or glittery effect. These need more binder to help the shimmer stick.
- Cream Eyeshadows: Created by mixing pigments with oils or waxes for a smooth, blendable finish.
Each type requires a slightly different mixing ratio, so experiment until you achieve your ideal texture and opacity.
Mixing the Pigments
Once you’ve chosen your colors, it’s time to mix them.
- Add your mica pigment and base powder into a small bowl.
- Slowly mix in a few drops of rubbing alcohol or binder using your spatula.
- Blend thoroughly until the mixture has a soft, dough-like texture.
- If you want a shimmery look, sprinkle in some extra mica powder or fine glitter.
Remember: Start small — it’s easier to add more pigment or binder than to fix an overly wet mixture.
Pressing the Eyeshadow
Now that your mixture is ready, it’s time to press it into pans.
- Place your mixture into the metal pan, flattening it gently with your spatula.
- Wrap a coin (that fits the pan) in a clean cloth or paper towel.
- Press down firmly to compact the eyeshadow.
- Let it dry for 24–48 hours in a cool, dry place.
This step gives your homemade eyeshadows a professional look and helps them last longer without crumbling.
Assembling Your Custom Palette
After your shadows are fully dried and pressed, it’s time to assemble your palette:
- Arrange your pans by color family or finish (matte to shimmer).
- Use a magnetic palette to easily swap or replace shades later.
- Add labels to identify each shade — especially if you plan to recreate them.
You can use empty palettes from brands like Z-Palette, MAC, or even repurpose old compacts.
Decorating and Personalizing Your Palette
One of the best parts of making your own palette is personalizing it.
Here are a few fun ideas:
- Decorate the palette exterior with stickers, washi tape, or acrylic paint.
- Add a mirror inside for convenience.
- Name your shades — this adds a professional touch and makes it uniquely yours.
By customizing both the inside and outside, your palette becomes a reflection of your creativity and identity.
Caring for Your DIY Eyeshadow Palette
Proper care ensures your handmade palette lasts longer:
- Keep it in a cool, dry place to prevent moisture damage.
- Wipe pans clean occasionally to avoid color contamination.
- Always use clean brushes to maintain pigment quality.
- Replace or re-press shades that start to crumble.
If stored correctly, your custom palette can last up to 12 months or more, depending on the ingredients used.
Tips for Perfecting Your Palette
Here are a few pro tips to improve your results when you make your own eyeshadow palette:
- Experiment first: Test small batches to find your ideal pigment-to-binder ratio.
- Balance matte and shimmer: A mix of finishes gives more depth to your looks.
- Stick to a color story: Cohesive palettes look more professional and easier to use.
- Use high-quality pigments: Cheaper options can lead to chalky or uneven results.
- Keep notes: Write down every recipe — exact quantities, colors, and binders — so you can replicate or tweak them later.
Conclusion
Creating your own palette is a fulfilling way to express your creativity and take full control of your makeup routine. When you make your own eyeshadow palette, you’re not just blending colors — you’re crafting something truly personal, tailored to your skin tone, preferences, and artistry.
From choosing shades to pressing pigments, every step brings you closer to a customized, one-of-a-kind product that reflects your unique beauty. Whether for personal use or as a gift, your DIY eyeshadow palette will be a stunning symbol of creativity and confidence.
FAQs
1. How long does it take to make your own eyeshadow palette?
Typically, the process takes about 2–3 hours for mixing and pressing, plus 24–48 hours for drying time.
2. Can I make my own eyeshadow palette without pressing the powders?
Yes! You can leave them as loose pigments in jars if you prefer, but pressing them makes application easier and cleaner.
3. Are homemade eyeshadows safe for sensitive skin?
They can be, provided you use cosmetic-grade, skin-safe pigments and avoid harsh chemicals or fragrances.
4. How many shades should I start with?
If it’s your first time, begin with 4–6 shades to learn the process before expanding to a full palette.
5. How long do DIY eyeshadows last?
Homemade eyeshadows typically last 6–12 months, depending on storage and ingredients. Always check for changes in smell or texture.
Also read: Best Transparent Nail Colors for a Clean and Glossy Look

