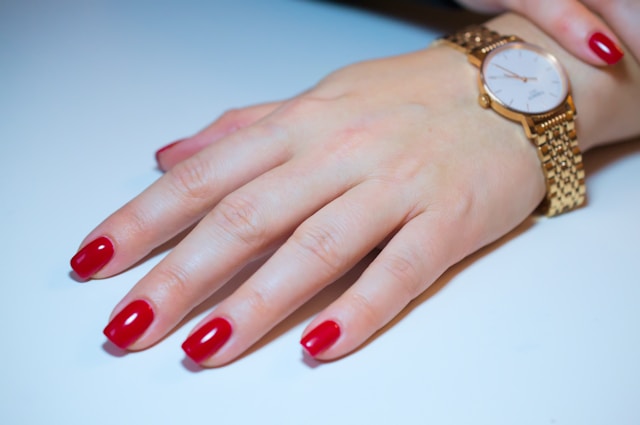
A classic gel manicure is one of the most sought-after beauty treatments for nails, offering a long-lasting, glossy, and chip-free finish. Whether you’re a frequent salon-goer or someone looking to master at-home gel manicures, it’s important to know the ins and outs of achieving perfectly polished nails every time. With the right technique, tools, and aftercare, you can enjoy salon-quality nails without worrying about chips or dullness for weeks.
In this article, we will share 10 expert tips to ensure your classic gel manicure is flawless from start to finish. These tips will guide you through the preparation, application, and maintenance process, so your nails look stunning every time.
1. Prep Your Nails Properly
Before applying gel polish, proper nail prep is crucial for ensuring the longevity and smoothness of your manicure. Start by removing any old polish with a non-acetone remover to avoid drying out your nails. Gently file and shape your nails to your preferred length and shape. Buff the surface of your nails lightly to remove any oils and dead skin that can prevent the gel from adhering properly.
Don’t forget to push back your cuticles and clean the nail beds with a brush to remove dirt and oils. If you skip the prep steps, you may notice that your gel manicure lifts or chips prematurely, so don’t rush this process!
2. Use a Base Coat
A base coat is essential for achieving a smooth, even surface for your gel polish to adhere to. It acts as a primer, ensuring that the gel sticks properly and that it lasts longer. Make sure you apply the base coat in thin layers, and don’t forget to seal the edges of your nails. This will prevent chipping around the tips, which is one of the most common issues with gel manicures.
Curing the base coat in a UV or LED lamp is essential. Follow the manufacturer’s recommended curing time to ensure it’s fully set before applying your color polish.
3. Choose High-Quality Gel Polish
Not all gel polishes are created equal, and choosing a high-quality product will ensure a longer-lasting, smoother finish. Stick to well-known brands, as they offer gel formulas that provide better consistency, more vibrant colors, and greater durability. A good gel polish should have a smooth texture and apply evenly, without streaking or clumping.
If you’re new to gel manicures, look for a starter kit that includes both the gel polish and the required base and top coats. It’s always better to invest in quality products to avoid disappointment in the results.
4. Apply Thin Layers
When applying gel polish, thin layers are key. Thick layers of gel may take longer to cure properly and can lead to uneven application or an overall bulky finish. Apply one coat at a time, and be sure to cure each layer before applying the next one.
The best way to ensure smooth, even coats is to use a gentle sweeping motion with the brush. Start at the base of the nail and work your way up, being careful not to flood the cuticles with gel. Thin layers help the gel polish set more evenly, leading to a polished finish.
5. Cap the Free Edge
One of the most important tips for a long-lasting gel manicure is capping the free edge of your nails. The free edge is the part of the nail that extends beyond your fingertip. By applying gel to this area, you help seal the entire nail and reduce the chances of the polish chipping or lifting at the edges.
To cap the free edge, swipe the brush along the tip of your nail after applying each coat of polish. This simple step will significantly improve the durability of your manicure, especially in areas that experience the most wear.
6. Don’t Skip the Top Coat
A top coat is essential for finishing your gel manicure. It not only adds a glossy shine but also protects the color layer from chipping, scratching, or dullness. Apply the top coat in thin layers, just like the color coats, and don’t forget to cap the free edge.
After applying the top coat, cure your nails under a UV or LED lamp for the recommended time. This step is crucial as it ensures the polish hardens and sets properly. A top coat provides an extra layer of protection to ensure your nails stay looking fresh and polished for as long as possible.
7. Proper Curing Is Essential
Improper curing is a common cause of gel manicures not lasting as long as expected. Make sure that each layer—base coat, color coat, and top coat—is cured properly under a UV or LED lamp. Follow the manufacturer’s instructions for curing time, as this can vary depending on the type of gel polish and the lamp you are using.
Typically, curing takes around 30 seconds to 2 minutes, but it’s important to make sure each layer is fully set before applying the next. If you’re unsure, it’s always safer to cure for a little longer than too short a time.
8. Avoid Touching Your Nails After Application
After you’ve cured your top coat, it’s important not to touch your nails until the entire process is complete. Even after curing, gel nails may still have a sticky residue, known as the inhibition layer. This layer can be removed by wiping your nails gently with a lint-free wipe soaked in rubbing alcohol or a gel cleanser.
Touching your nails before this step can cause smudges or imperfections, so allow your nails to cool and fully set before using them. This will ensure that the finish is flawless and shiny.
9. Regular Maintenance and Touch-ups
Gel manicures are designed to last for weeks, but they aren’t immune to wear and tear. If you notice any chips or small imperfections, it’s important to address them as soon as possible to prevent further damage. A small touch-up with the same color polish and a new top coat can extend the life of your manicure.
In addition, make sure you’re moisturizing your nails and cuticles regularly. Use cuticle oil to keep your nails healthy and hydrated, which will help prevent peeling or lifting of the gel.
10. Remove Gel Manicure Safely
When it’s time to remove your gel manicure, make sure you do it properly to avoid damaging your nails. Never peel the gel off, as this can cause your natural nail to peel and weaken. The safest method is to soak a cotton ball in acetone, place it on each nail, and wrap your fingers in foil. Let it sit for about 10-15 minutes, then gently scrape off the gel with an orangewood stick.
After removing the gel, treat your nails with a moisturizing treatment to restore hydration and strength.
Conclusion
Achieving a flawless classic gel manicure at home is entirely possible with the right tools, technique, and attention to detail. From proper nail preparation to the final top coat, each step plays an essential role in achieving perfectly polished nails every time. By following these 10 tips, you can enjoy long-lasting, shiny nails that stay chip-free for weeks.
A classic gel manicure is an investment in both your nails and your beauty routine. With the proper care and maintenance, you can enjoy salon-quality nails without stepping foot in a salon.
FAQs
1. How long does a classic gel manicure last?
A classic gel manicure typically lasts 2-3 weeks without chipping or fading, depending on your nail care habits and the brand of gel polish used.
2. Can I do a gel manicure at home?
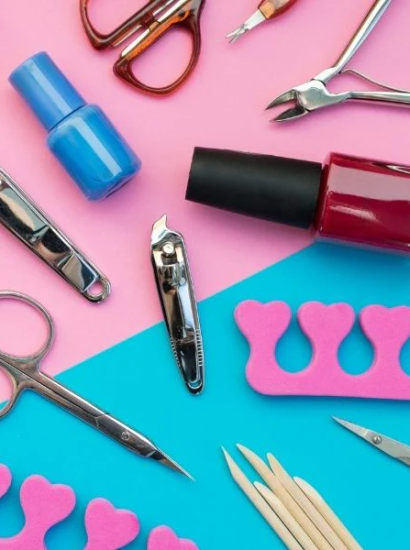
Yes, you can absolutely do a gel manicure at home. You’ll need a UV or LED lamp, a base coat, color polish, and a top coat, as well as nail prep tools like files and cuticle pushers.
3. How do I remove a gel manicure at home?
To remove a gel manicure, soak cotton balls in acetone, apply them to your nails, wrap with foil, and let it sit for 10-15 minutes. Afterward, gently scrape off the gel with a wooden stick.
4. Why is my gel manicure lifting?
Lifting can occur if the nails weren’t properly prepped, the layers of polish were too thick, or the gel wasn’t cured properly. Ensure you’re using thin layers, capping the edges, and curing the nails thoroughly.
5. Can I use regular nail polish over gel?
It’s not recommended to apply regular nail polish over a gel manicure, as it can affect the longevity and finish of the gel. If you want to change your color, it’s best to remove the gel manicure completely and start fresh.
Also read : Good Eye Cream for Wrinkles: Top Picks, Ingredients & Anti-Aging Tips