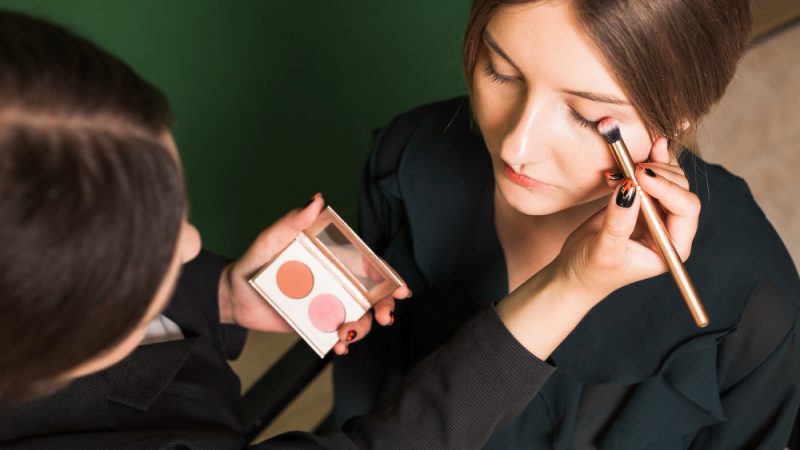
When it comes to defining the eyes, Eyeliner Brush eyeliner is a makeup essential. Whether you’re going for a bold wing, a subtle tightline, or a smudged-out smoky look, the key to achieving a professional finish often lies in one tool: the eyeliner brush.
But not all eyeliner brushes are created equal—and neither is the way you use them. If you’ve struggled with wobbly lines, uneven flicks, or smudges that ruin your look, don’t worry. With the right techniques and a few expert tips, you can master the art of eyeliner with precision and ease.
1. Choose the Right Eyeliner Brush Shape
There are several types of eyeliner brushes, each with a unique purpose. Understanding the shape can dramatically improve your technique.
Angled Brushes are great for wings and defined lines.
Fine-Tip Brushes offer precision for detailed looks.
Flat Brushes work well for tightlining or smudging along the lash line.
Bent Eyeliner Brushes offer better visibility during application.
Expert Tip: If you’re a beginner, start with a fine-tip or bent eyeliner brush to get maximum control.
2. Use Gel or Cream Formulas for More Control
While liquid liners come with their own applicators, gel and cream liners require a brush—and they offer more flexibility. They glide on smoothly and are forgiving if you make a mistake.
Expert Tip: Dip your eyeliner brush lightly into the pot and remove excess on the back of your
hand before applying. This prevents overloading the brush.
3. Always Start with a Clean Brush
Your eyeliner brush should be cleaned regularly to avoid buildup, bacteria, and uneven strokes. A dirty brush can drag product and create streaky or patchy lines.
Expert Tip: Use a gentle brush cleanser or micellar water and allow the brush to air dry completely before the next use.
4. Use Short, Controlled Strokes
One of the most common mistakes people make is trying to draw the entire line in a single stroke. This often leads to jagged lines.
Expert Tip: Work in short, small strokes along the lash line. Connect them gradually to build the desired shape.
5. Steady Your Hand With the Right Grip
A shaky hand can ruin the cleanest brush. Instead of hovering, anchor your hand by placing your elbow on a table and resting your pinky on your cheek.
Expert Tip: Hold your brush closer to the bristles for maximum control and stability.
6. Map Your Wing Before Filling It In
Creating the perfect wing can be tricky. Instead of winging it (pun intended), sketch the shape first using light strokes or dots.
Expert Tip: Start by marking three points—where the wing starts, peaks, and ends. Connect the dots before filling in for a sharp, balanced flick.
7. Adjust the Brush Angle for Different Effects
The angle at which you hold your brush can change the look of the eyeliner. A flatter angle will give a smudged or smoky finish, while a perpendicular grip results in cleaner lines.
Expert Tip: For a softer, natural look, tilt the brush horizontally. For sharp cat-eyes, use the brush tip directly for precision.
8. Set Your Liner With Eyeshadow
Even the best eyeliner can fade or smudge over time. Lock in the look by lightly pressing a matching eyeshadow over the line using the same eyeliner brush or a flat detail brush.
Expert Tip: Use translucent powder under your eyes before applying liner to absorb oils and keep the pigment in place.
9. Clean Up With Concealer and a Flat Brush
No one gets it perfect on the first try. Use a bit of concealer on a flat brush to clean up the edges of your liner and sharpen the wing.
Expert Tip: A peach-pink toned concealer works especially well to neutralize redness around the eyes while correcting mistakes.
10. Practice Makes Precision
Even professional makeup artists didn’t master eyeliner overnight. The key to flawless application is consistency and practice.
Expert Tip: Set aside time each week to try new eyeliner styles—tightlining, graphic liner, or bold wings. Over time, your confidence and control will improve.
Conclusion: Make the Eyeliner Brush Your Best Friend
A quality eyeliner brush isn’t just a tool—it’s your secret weapon for expressive, beautiful eyes. Whether you’re a beauty beginner or a seasoned makeup lover, mastering your eyeliner brush can completely change the way you define and enhance your eyes.
By choosing the right brush, working in small strokes, and practicing regularly, you can go from shaky lines to sharp wings in no time. So the next time your eyeliner doesn’t cooperate, remember: it’s not you—it’s your technique. Now, you’ve got the tips to fix it.
FAQs
1. What type of eyeliner brush is best for beginners?
A fine-tip or bent eyeliner brush is great for beginners because it allows for more control and visibility during application. These brushes make it easier to draw precise lines, especially when learning.
2. How often should I clean my eyeliner brush?
Ideally, you should clean your eyeliner brush after every use, especially if you’re using gel or cream products. This helps prevent product buildup and bacteria, and keeps the brush in top shape.
3. Can I use the same brush for different eyeliner colors?
Yes, but clean the brush thoroughly between uses to avoid color mixing or muddy application. Dedicated brushes for different colors can help streamline your routine.
4. What’s the best way to fix a crooked eyeliner line?
Use a flat brush with concealer to clean up the edge. If you’re still working on the line, smudge it out with a cotton swab or apply shadow over it for a softer look.
5. Can I use an eyeliner brush with liquid eyeliner?
Typically, liquid eyeliners come with their own applicators. However, if you’re using a liquid liner from a pot, you can use a fine-tip brush for more control. Just make sure the brush is designed for liquid formulas.
Also read : Gel Manicure Near Me: Where to Get Long-Lasting, Chip-Free Nails


